
Terrain editing in action, the image on the right shows ingame view.
A reminder – Wing Breakers track editor is an online browser based editor, you can find it here:
https://www.wingbreakers.com/wb-editor
Editor uses WebGL so your browser must be recent enough to support it – Chrome and Firefox desktop browsers would be best, running editor on mobiles is questionable to say the least.
Hopefully you read through editor basic guide Track Editor Quick Start.
This second guide is meant for players that can create a basic track and are ready to handle more advanced stuff.
Below is a more in-depth explanation of different editor features.
Scenes Navigation
1. Walk Mode: Use mouse to move around the scene. Hold left and right mouse buttons (MB) to move forward/backward and wheel MB to look around.
2. Orbit Camera: Select object to observe. Hold left MB to orbit camera around the object, right MB to pan and wheel MB to zoom in and out.
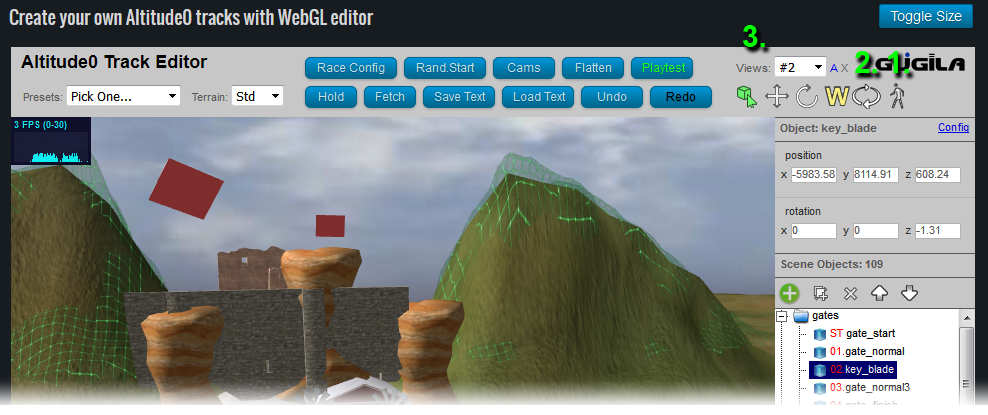
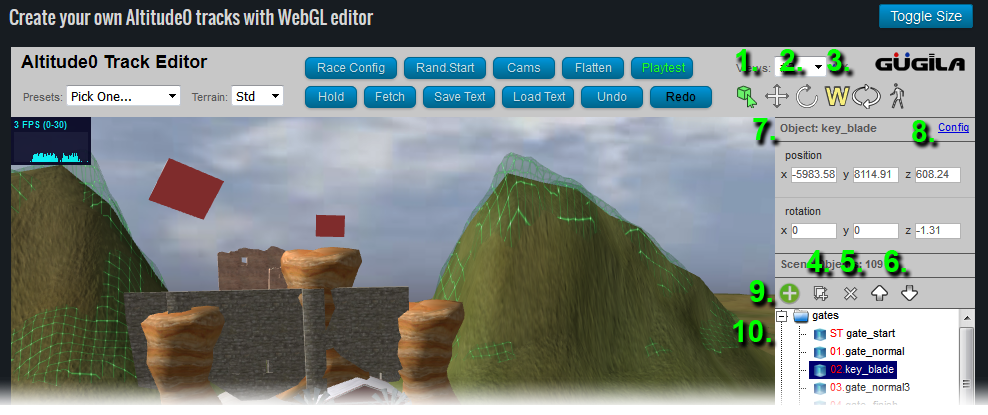
3. Views: Preserve current camera view for later, this is useful when working on complicated tracks. You can preserve many different views, press icon ‘A’ to add a new view, and ‘X’ to delete it.
Object Handling
Creating tracks is mostly about placing objects around the scene. You can handle each object separately or handle them as a group.
1. Select Mode: Click left MB to select the object. Use Ctrl key + left MB to select multiple objects. Last objects selected will be displayed on the panel (option #7) and will be the object that is used as the center for rotations and placement.
Right MB can be used to quickly place currently selected object on the scene and will at the same time align (rotate) the object towards the camera.
Wheel MB works almost same as right MB, used for placement, except it will not align (rotate) the selected object, only position it.
2. Move / Rotate: Selected objects can be moved and rotated individually or as a group. You can also type in position and rotation through the panel (option #7).
3. World / Local Space: Objects can be rotated and moved in world or local space. It’s needed for precise object placement – check the direction axis is pointing in to see the difference.
4. Duplicate: Create copies of selected objects. Idea: create a complicated composition with many objects in it and then copy it around the scene to save time.
5. Delete: Delete selected objects.
6. Reorder Objects: Change order of selected objects in the scene object list (option #10). Order can be important when working with gates & terrains, read more about it below: ‘Placing Gates’ and ‘Terrain Editing’.
7. Object Edit Panel: It displays currently selected object: name, position and rotation. If multiple objects are selected, the last one selected is shown. The last object selected is also used as a rotation and placement center.
8. Object Config Menu: Configuration menu only shows for certain objects.
In case of machine gates you can adjust machine timing – so that machines don’t all move at the same time.
Replay camera objects have camera type specified in config menu.
9. Object Library: Add new objects to the scene. A big, ever-expanding list of objects will open up, where you can find different type of objects to put around the scene: gates, machines, explosive barrels, ruins, terrains and many more.
10. Scene Object List: Shows all objects that are currently in the scene. You can select objects by name, hold Ctrl key + left MB for multi selection. You can also rename an object (to your liking) by right MB clicking on the object name.
Scene Management
These are the tools that are used to manage scene as a whole.
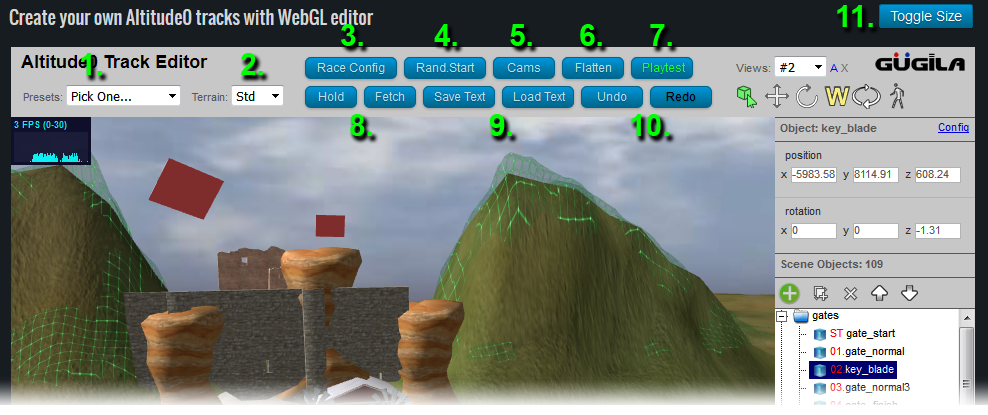
1. Presets: New track creation usually starts here. You can start with one of predefined template tracks.
2. Terrain Quality: Set terrain detail level. Higher quality terrain is more detailed but it could run slower. You can change this setting anytime.
3. Race Configuration: Adjust a bunch of race specific parameters.
– Race Laps: Set number of laps if you are creating a looping track.
– Extra Rules: Race can have extra rules that must be completed for the race to count: aero points required, maximum average height. Play the game to learn about extra rules.
– Ad board message: If you place ad board objects in the scene then you can write an ad board message that will be shown to players.
4. Random Start: Feel inspired to start from scratch? This resets the current scene, removes all objects and places start gate randomly somewhere in the scene. Click this button a couple of times, maybe you find a good place for your next track layout by chance.
5. Cams: Every race needs watch cameras. These are important for watching replays and spectating races. Click this to have random cameras recreated based on gate positions. Newly created watch cameras will be put under CameraReplay folder in ‘Scene Object List‘. If you select a camera you can adjust camera type under Config menu: Zoom, Static, Follow plane camera and more.
6. Flatten: Used to update terrain when working with terrain objects. Read ‘Terrain Editing’ for more.
7. Playtest: Take your track to the game. Please read the first guide ‘Track Editor Quick Start‘ for more.
8. Hold / Fetch: Quick temporary save / restore for your scene. Good if you are testing different things. This feature uses browser cookies so don’t rely on it to preserve your data over multiple days.
9. Save Text / Load Text: You can export the scene to human readable format, edit it in notepad and import it back. Or just save scene as text for later use.
10. Undo / Redo: The most useful feature that shouldn’t need explanation. You can have multiple levels of undo for easier work.
11. Toggle Screen Size: Make screen bigger for easier work.
Placing Gates
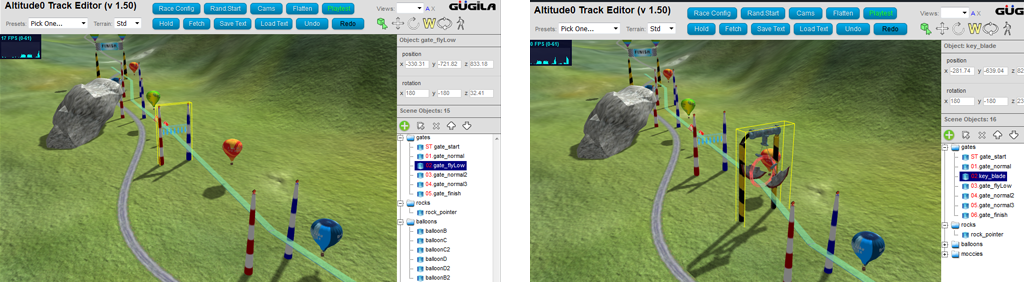
Gates are the most important feature of each track. Clicking on a gate will show green line that connects gates in order of how they must be visited by planes. You can always reorder them through the ‘Scene Object List‘.
Gate orientation is also important, always make sure that red gate is on the left and blue gate is on the right side of the plane passing through.
Except for standard gates, there are also machine gates: fire rings, blades, recking balls and more. These gates are different than normal gates – plane must always pass through them. This is symbolized by a red ring in the center that the plane must go through during the race.
Terrain Editing
Terrains are the godly feature of this editor. You can position terrain objects like hills, mountains, canyons, crevices and shape the final terrain to your liking.
Editor does not show terrain in its fully glory, it’s only an approximate shape and look. Start Wing Breakers game to see terrain the way it is meant to be seen: ingame terrain will show high quality procedural details, trees will not grow on steep slopes, peaks will be covered with snow and so on.
Terrain objects can be found in the ‘Object Library‘ under flatten group. You can overlap them but remember that how you order them in ‘Scene Object List‘ matters – they modify terrain in the same order and changing order of overlapping terrain objects will produce different results.
Once you move terrain objects around, click ‘Flatten‘ to update the terrain. To make your work easier, terrain modifying should probably be the first step of track creation before placing objects.
Also check out fly-through houses like barns and hangars. They come with their own terrain flattening to make it easier to have precise terrain-house contact. Try them out too!
Some features on terrain like roads are fixated and terrain cannot be modified under them. If you place a mountain over the road, you will create a very deep canyon because road part will not move – this could be a fun and simple way to create Star Wars canyon style race.
Note: Be careful with terrain editing. Walls and mountains that are too steep will slow down computer and start showing cracks. This will not be pleasant for players. Best thing is to avoid cracks that are too deep and moountains that are too steep.
In any case, run the game and test!
Forest Cutters
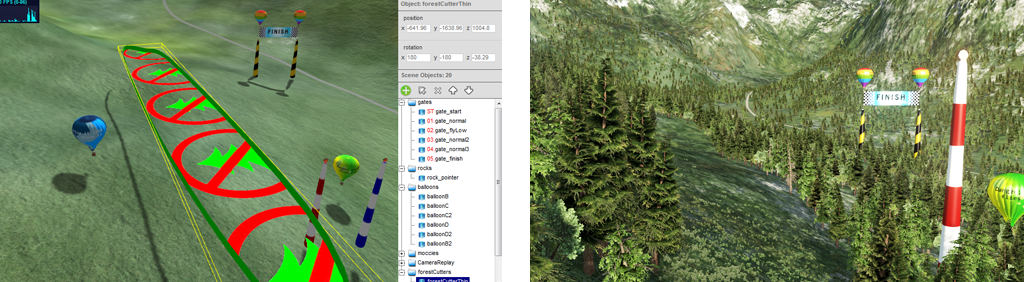
Forest cutters as the name suggests are grids that block big trees and bushes from being planted in certain areas. Editor does not show thousands of trees, they are procedurally planted ingame before the race starts. You will have to run the game to see these huge forests.
Forest cutters in editor can overlap and need to be placed only approximately close to the terrain. Cutters are useful if you are creating race through a forest heavy section and would like to create clearance around your race track.
Creating Track Image
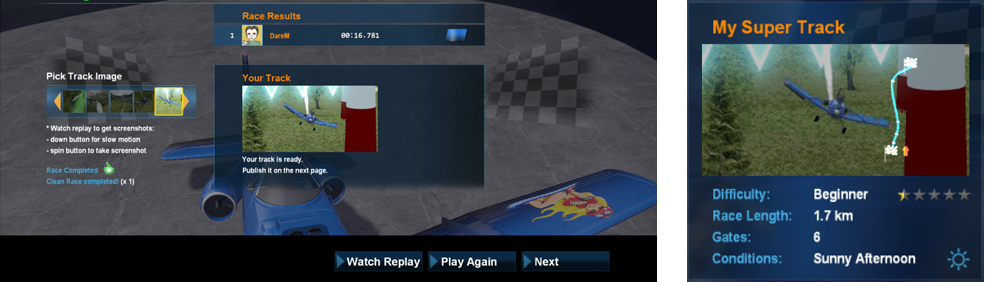
Every new race track needs an image that will represent it.
This is usually the last step of track creation, done just before you publish your track. A reminder on how to publish a track can be found in the previous guide ‘Track Editor Quick Start‘.
Finally, track is created and you finished playtesting your track. Time to watch replay of your playtest and take some screenshots (press Spin button). You can grab multiple screens – use slow motion (press Arrow Down button) to get better race moments. Pick one on of these screenshots as your track image. This image will forever represent your track, so take time to find a good one.
That’s it!
We didn’t go much into all different types of objects that are available for placement: ruins, bridges, houses, balloons, farms, exploding barrels…
Please explore them yourself, we are constantly adding new objects to the game to make it more fun.
Have fun and be creative!